Composting at home can also help solve the issue of climate change! Global warming is the most serious issue currently facing humanity. Home composting can assist in reducing the possibility of kitchen waste entering landfills and incinerators, avoiding the generation of methane from decomposition due to environmental hypoxia in landfills as well as the production of dioxin in incinerators. According to World Bank statistics, food and green waste makes up 44% of the total global waste stream and billions of tons of waste is generated annually. Moreover, home composting can reduce the pressure on garbage collection by local authorities, making it a good, simple, user-friendly choice for environmental action.
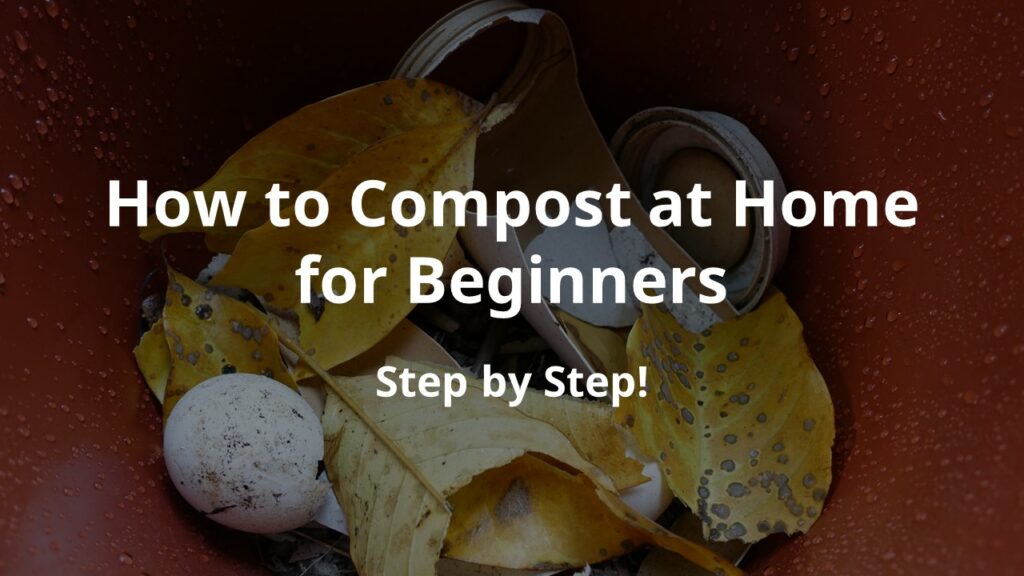
What is Home Composting?
Home composting means building a small farm where kitchen and garden waste can be stored and compost can be made in a home environment. Rather than expensive and precise electronic equipment, this farm only requires basic plastic bins that are free and easy to make. Furthermore, size can be adjusted according to personal requirements. Place dry sticks, leaves, peels, bread, coffee grounds and home-compostable products in the bins, allow them to react with microorganisms or worms, and they will naturally decompose into nutrient-rich humus. Utilizing this process in the backyards or pots at home can not only facilitate plant growth and restore soil health, but also assist in reducing the inconvenience of garbage dumping.
Why do We Need to Compost at Home?
Home composting is suitable to meet the needs in any of the following circumstances:
- Where free, natural and healthy fertilizers are desired to better grow plants in pots or gardens at home.
- When a person is able to cook and the cooking produces family waste such as withered outer leaves of vegetables, onions, outer skins of carrots, stems of cauliflowers and cabbages and eggshells. Meanwhile, he or she does not want to frequently go downstairs to dump garbage but is worried to let the kitchen waste accumulate, he or she would hope that food waste would automatically disappear.
- Where a person prunes trees at home or when all kinds of dry sticks, fallen leaves and grass clippings are produced in the backyard; it is unsightly to put them straight on the soil, but throwing them away directly would be a waste.
- When a person fears that the endless garbage produced by humans may contribute to more incinerators and landfills in the future; some of which may be built near to their own homes.
- If people want to contribute their strength to the mitigation of global warming and further avoid climate change at a time when there is increasing TV news about forest fires, hurricanes and blizzards.
- When there are children in the family and parents would like to improve the parent-child relationship as well as educating the children about environmental protection by composting at home together.
All We Need to Make Compost at Home
What material should be prepared for home composting? There are currently 3 main methods of home composting, including on-site composting, bin composting and worm composting. The equipment needed for each method differs:
Circling a space is all that is needed for on-site composting. However, as weather conditions such as rain and wind can damage compost, it is recommended that additional equipment capable of protecting compost and preventing it from being blown away (e.g. sandbags and canvas) be prepared.
Bin composting, as the name implies, is composting with compost bins. They are suitable for use in indoor or outdoor spaces and can be made from plastic trash cans with covers for basic DIY efforts or acquired directly by purchasing ready-made compost bins from the market. Details will be provided in the sections below.
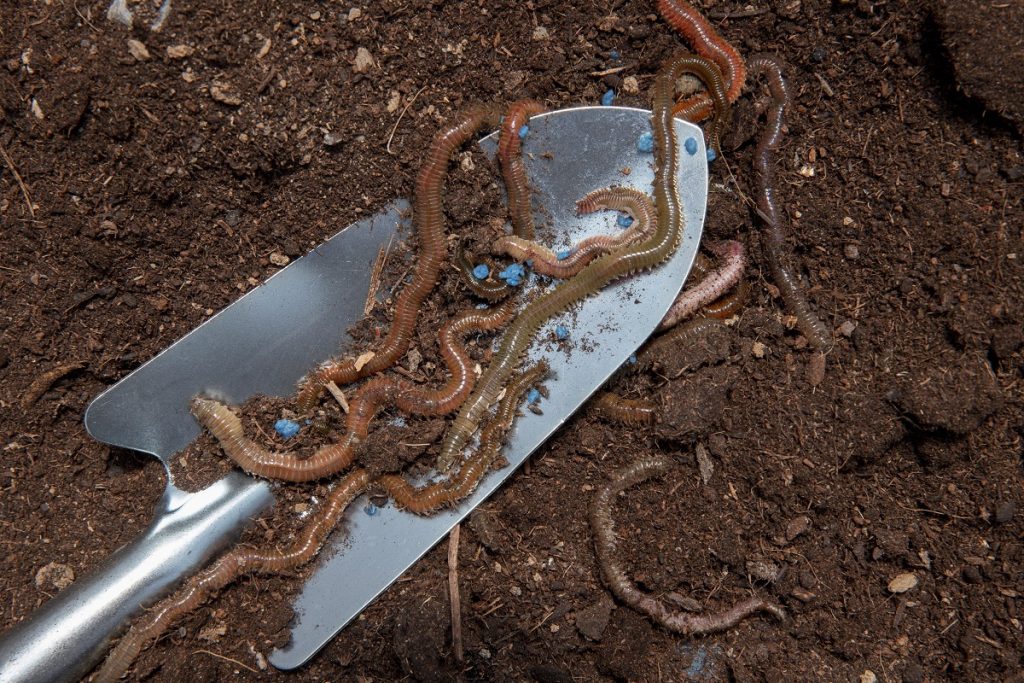
Facilities similar to compost bins also need to be prepared for worm composting. The main difference here is that these bins must have holes in the bottom to facilitate water discharge and the addition of worms (the number of worms is based on the required compost amount) to assist in the composting. Temperature and moisture meters may be purchased to monitor the environment as worms have their particular temperature and moisture needs. Watering cans, water sprayers or water mist nozzles should also be prepared to maintain soil moisture.
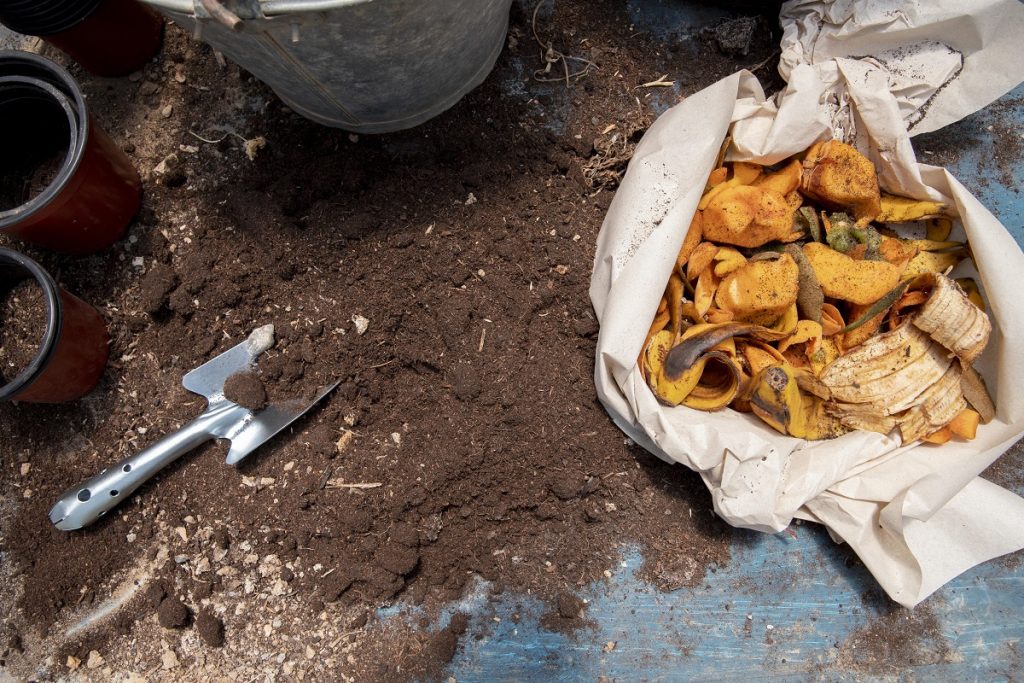
Once materials for composting have been prepared, the collection of items for composting can be made. These are mainly divided into two categories: nitrogen- (green) and carbon-rich (brown) materials. In a combination with the nitrogen-rich material occupying 25-50%, well-mixed compost piles will heat up themselves and accelerate the decomposition rate without generating a rotting odor. Common carbon-rich (brown) materials include dry leaves and sticks, sawdust, shredded paper and cardboard, clothes and products with “home-compostable” labels. Nitrogen-rich (green) materials include plant-based food residues, eggshells, coffee grounds and filters, tea residues and tea bags as well as fresh leftovers from gardening and pruning. Additional containers such as bottles, buckets or cartons may be prepared to collect these composting materials.
How to Compost at Home for Beginners? Step by Step!
Step 1: Choose the appropriate composting method
The following are the advantages of the three common composting methods at present – on-site, bin and worm composting – as well as the groups for which they are suitable:
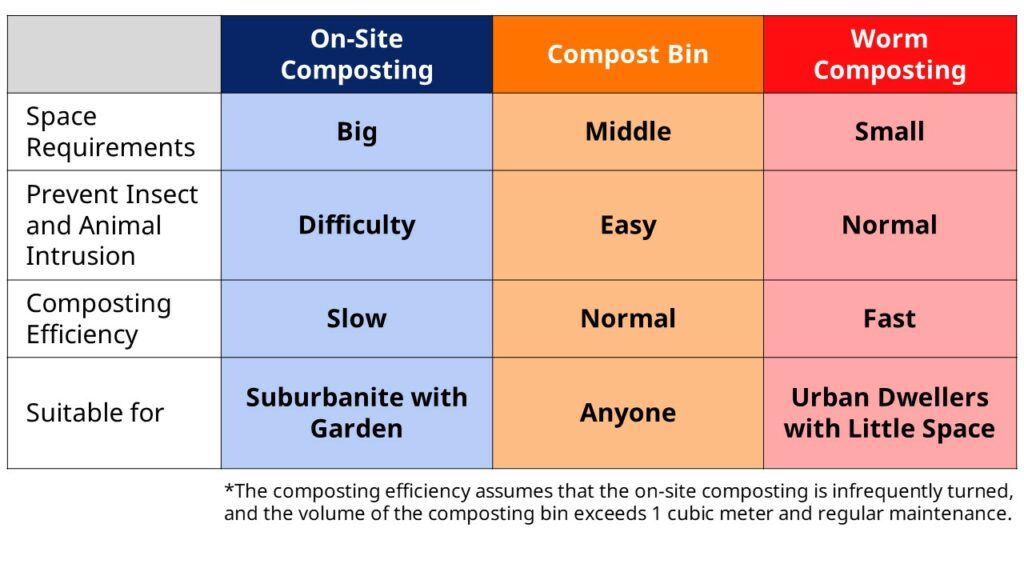
On-site composting – Find a space in the backyard for composting. Easy to do and does not require compost bins; also convenient to collect dry sticks and fallen leaves from other plants in the yard. Furthermore, the final compost can be used on other plants nearby. This composting method is suitable for those who do not want additional compost bins while having adequate space in the yard at home.
Bin composting – Make or purchase compost bins and put composting materials into them to compost. This is applicable to indoor and outdoor environments. This bin method makes it easy to move the compost as long as the compost bins are not too big, facilitates the management of the composting, avoids attracting animals or insects as well as preventing compost piles from being destroyed by strong winds or floods. In addition, it provides a higher decomposition rate compared with that of on-site composting, making it suitable for families that have animals in or around their homes, or where natural disasters may occur.
Worm composting – Other than microorganisms, worms can also be added to decompose waste. Worms will help fluff up the compost piles and accelerate the rate of composting. Compost tea, an excellent liquid compost, will be produced at the same time. This method is suitable for families that are not afraid of worms, do not want to turn compost piles on a regular basis, or are unwilling to directly dig out the compost for use but prefer to spray liquid fertilizer on other plants.
Step 2: Arrange composting areas
Areas where sunlight cannot reach are the recommended choice regardless of the composting method. The areas for on-site composting can be simply surrounded with pallets or wooden boxes to roughly protect them from wind and rain.
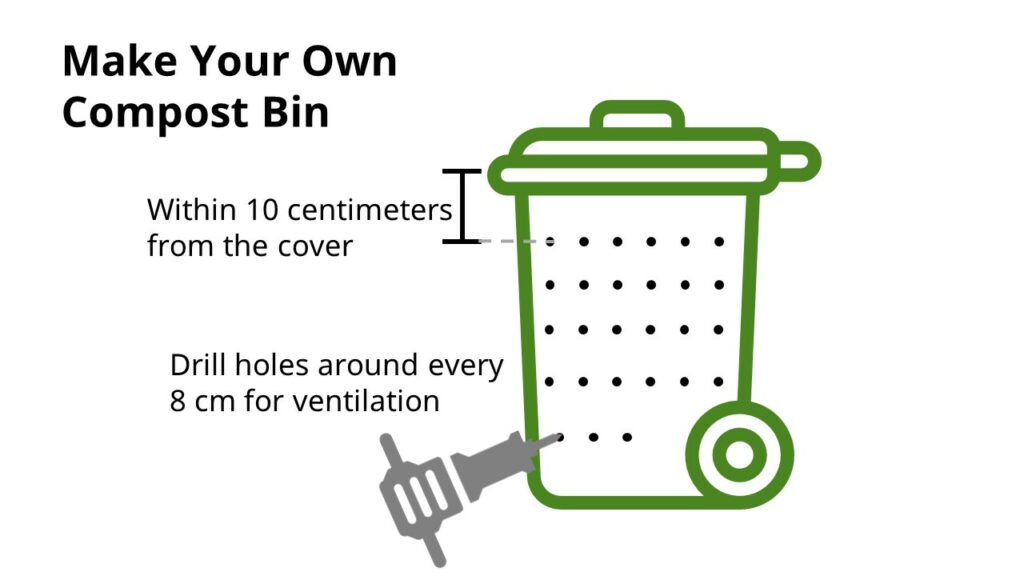
Compost bins can be self-made. The simplest method is to prepare an outdoor plastic trash can with a cover. After all labels are removed, drill a large number of holes in the sides. The distance between holes should be around 8 centimeters, while the area within 10 centimeters from the cover should remain untouched. Finally, clean up all plastic scraps to finish the task.
Those who do not have the tools or the time to make their own compost bins can buy them from the market. Some products in the market come with rolling and rotating functions, through which compost can be periodically turned over and filled with air. This will accelerate the rate of decomposition.
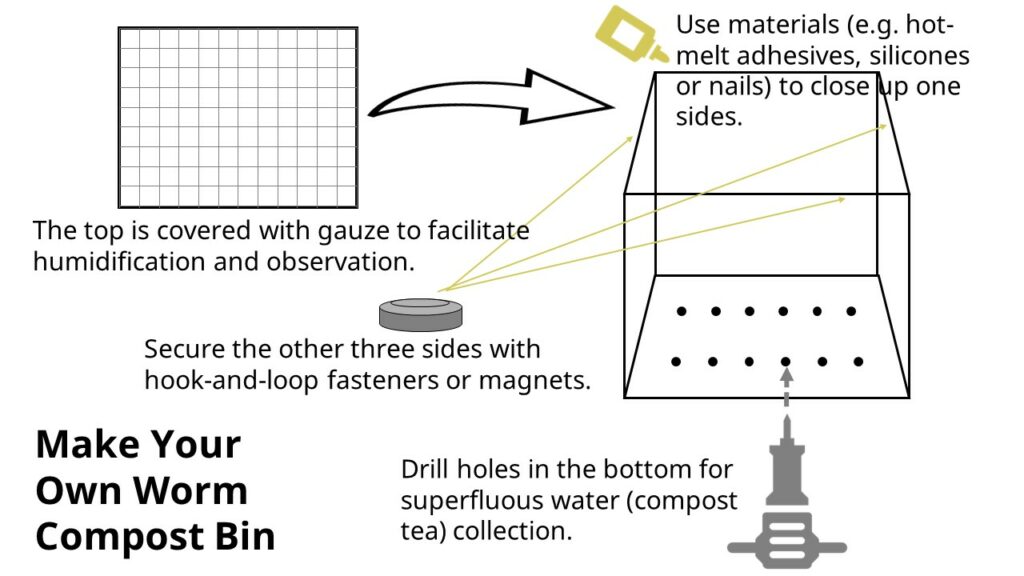
Smaller bins such as storage boxes and buckets are good choices for worm composting. Worms will help fluff up the compost, so you only have to drill holes in the bottom for superfluous water (compost tea) collection. Place an additional gauze cover on the top of the worm composting bin, use materials (e.g. hot-melt adhesives, silicones or nails) to close up one sides, and secure the other three sides with hook-and-loop fasteners or magnets to allow room to lift the lid and place new compost material.
Worms produce “worm casts” that are suitable for use as solid fertilizers and can be collected in around 1 to 3 months. For those unwilling to dump all of the compost and pick out the worms before putting it back every time, it is recommended to purchase multi-layer compost bins that are specifically designed for worm composting from the market. In addition, as worms are mostly active in the surface layer, after the layer is filled with the worm casts, they will crawl to the upper layer by themselves. Then, we can draw out the previous layer of the compost bin and easily collect compost that consists of worm casts.
There is a range of appropriate temperature and moisture for worms. Hence, keeping worm composting bins indoors is recommended to prevent the worms from being killed by extreme hot or cold weather in the outdoors.
Step 3: Collect composting materials
Composting materials may be collected once composting areas for on-site composting or compost bins are prepared. It is recommended that the starting ratio of greens and browns be set at approximately 1:2 and adjusted depending on the circumstances afterwards. Collect materials until there are enough to create a bottom layer and composting may begin.
If worm composting is adopted, normal soil (available at florists) at around 30%-60% of the bin volume should be prepared. Pay fishing tackle shops or compost supply stores a visit to buy worms. Watering cans, water sprayers or water mist nozzles can be purchased at garden shops and can help maintain soil moisture. If you want to feed the worms more carefully, you can buy temperature and moisture meters and stick them into soil for monitoring in order to ensure the appropriate living environment for worms.
Step 4: Add composting materials
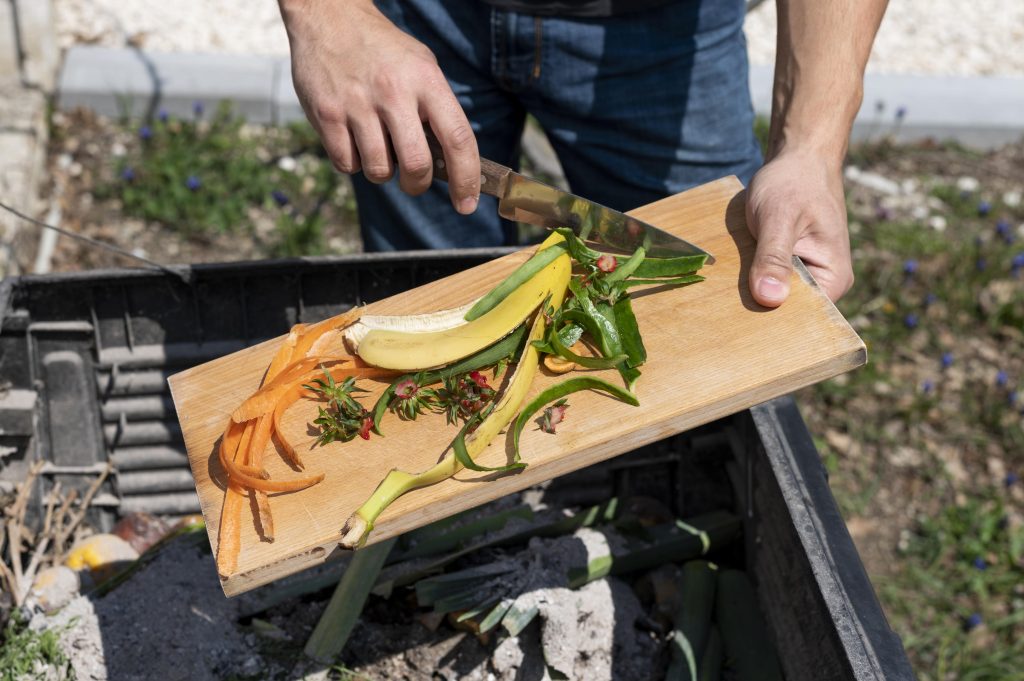
To accelerate decomposition, please prepare the materials before putting them into compost piles. Tools such as scissors, saws and blenders can be used. For instance, decomposition can be sped up by cutting bread into small pieces, sawing wood into sawdust and shredding renouvo’s home-compostable sugarcane cup with scissors before placement.
Step 5: Continue to maintain composting areas
In an ideal composting environment, moisture should be maintained at a specific range. Therefore, continuous addition of water is required. The moisture is optimum at around 60%. If the decomposition is too slow due to an unsatisfactory mixing ratio, greens should be added; when a rotting odor is generated, add browns. The ratio should be continuously adjusted until it reaches a balance. For worm composting, only greens need to be added continually. Additional browns are not necessarily required.
Appropriate moisture for worm composting is 70% to 80% while temperature varies from 15 to 30 degrees (depending on the type of worms used). Please continue to add water adequately and maintain a certain temperature where the worm compost is located (indoor environments are recommended).
Tips for Beginners to Compost at Home
Plan appropriate composting methods and locations of placement in advance
The composting method suitable for each family varies. A table has been provided below for quick identification of suitable composting methods and to help do more with less in home composting.
Stop animals from entering
Please fully cover the greens with the browns for on-site composting and remember to put the cover on after putting the compost into the compost bin. This can prevent bugs and rodents from being attracted and coming nearby. On the other hand, worm composting bins may be placed on hollow-designed racks and above water basins. Not only can this facilitate compost tea collection, but it can also prevent ants from entering and attacking the worms.
The easiest method: Buying a ready-made compost bin
For those who are not used to handcraft projects, a well-designed compost bin can be the first step for beginners. This will make things easier whether it is compost turning or collection.
Lacking browns? Here, we provide some solutions
The biggest sources of browns are dry leaves and sticks. However, not every family, particularly those in cities, has the space to plant trees. Browns are frequently lacking as a result. Normal paper with black and white print, clothes sewed from natural plant fibers and dyes as well as products labeled as “home-compostable” (e.g. Renouvo’s bagasse straws) can be utilized as browns. Alternatively, you can directly adopt worm composting. It should be noted that only home-compostable products certified by ABA Australia have been tested for worm toxicity.
What Problems Are There Beginners Would Have With Home Composting?
Imbalance between the produced greens and browns
Greens cover a majority of normal household waste including kitchen waste, and frequently cause an imbalance between greens and browns. Please refer to the tips above and try to solve this issue.
Compost giving off odor and attracting bugs
A possible reason for compost giving off an odor is an excess of greens or moisture. Please add in more browns for balance while temporarily stopping the input of greens.
Slow decomposition of compost
Adding more greens or turning the compost can help improve the decomposition rate. Another solution would be the input of more worms.
The lack of space for the placement of compost
The volume of a compost pile must reach one cubic meter to automatically heat up and accelerate decomposition. If smaller compost bins are chosen due to insufficient space or if the compost materials are not enough, worm composting would be the recommended method.
The time needed on compost maintenance
Composting is not the same as a simple addition of materials; observation on decomposition status and the balancing between greens and browns are continually required. In addition, not only should water be added appropriately, compost should also be turned every 5 to 7 days. If the compost bin lacks space, it should be drawn out and utilized. These require time to handle.
Worms getting everywhere
Worms might escape worm composting bins if the moisture and temperature in the environment is not favorable or if they are provided with an insufficient amount of waste to eat. Please maintain a good living environment for worms and block any cracks that allow worms to escape and crawl into the house.
What Are There Exactly Benefits of Compost at Home?
Home composting is a simple way to go green and practice environmental protection. It is suitable for most (if not all) people; whether they live in urban or suburban areas, they can assist in reducing the amount of garbage and mitigating climate change through home composting. Many products designed as decomposable in home composting environments are also gradually appearing. By composting these products at home, a circular economy can be achieved.